Categories: all aviation Building a Biplane bicycle gadgets misc motorcycle theater
Tue, 09 Mar 2021
Building a Biplane: My First Completely Failed Process
When I embarked on this project of building a biplane, I was pretty sure that I'd be making some parts over and over until I got it right. I wasn't sure what they'd be, but I'd heard too many tales of people making things three and four times until they got it right to imagine that I'd escape a similar fate.
Up until this point, I've been remarkably lucky, and have not actually produced very much scrap. Of course, the streak had to end.

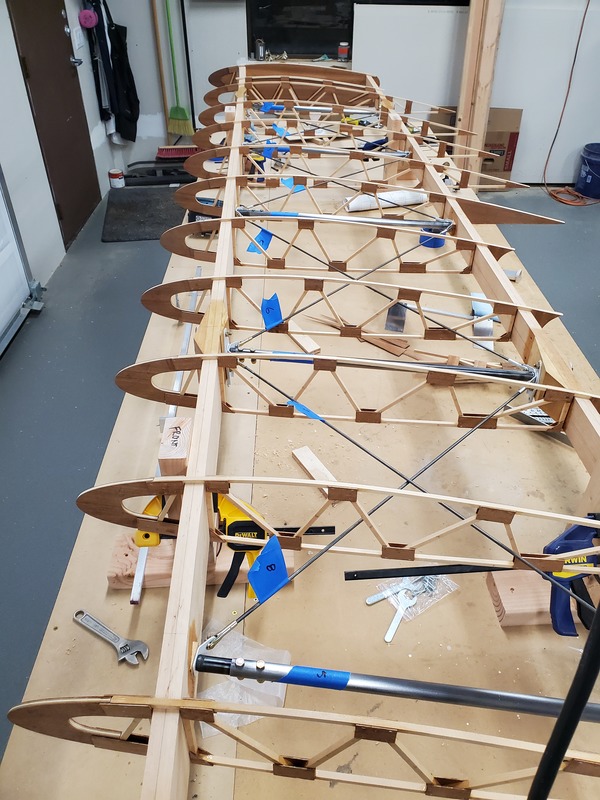
The wing, being constructed
I have finally reached the point of doing something that utterly failed, and had to be done over. It's just not quite what I'd expected.
I made the somewhat unconventional choice to do my painting with Stewart Systems' paint, which is uses water as a thinner, either waterborne, or actually water based. It's not that the Stewart Systems paint is better or worse, but it is definitely different than the solvent-based paints most people are used to. But I really liked the idea of not shooting actual poison into the atmosphere if I could avoid it.
So, I picked up a quart of the primer, and a quart of their two-part acrylic for the various steel parts that go inside the wings.
The basic problem I had, though, was that I had no clue what I was doing. Paint has always been a weak point with me, and I had questions about everything: tools to use, techniques to use, how to prepare the surface, how to even mix and apply the paint. So, I turned to a variety of sources trying to find out more.
I watched what seemed like the obvious videos Stewart Systems had produced, but they were heavily focused on either large aluminum surfaces, or on fabric. Good stuff, but not really applicable to spraying little tiny steel pieces, and even then, surprisingly light on the details I was looking for. I consulted with folks on the Biplane Forum, including one guy who worked in the automotive paint industry for his whole career, and who was acknowledged as the all-winning expert on anything paint.
Multiple people told me that if he said something, it was gospel, and so I followed his every word. I didn't implement everything he said (though I was planning to do so eventually), particularly on the "buy the best tools" front: in painting a bunch of 1" by 3" brackets, I couldn't see spending the money on a $1000+ compressor and $300 spray gun, though they will definitely be in my arsenal when it comes time to paint bigger things.
He gave me lots of hints and pointers that helped me along: how to use aluminum welding rod to make little fixtures to hang the tiny brackets from, how to set up an outdoor painting booth for painting small things, a good degreasing mixture, and so on. Good surface prep ideas. Which Scotchbrite to use, and which not to use.
Of course, I had to integrate all this advice with the sometimes contradictory advice I was getting about this water-borne paint I was planning to use. This is where the true problems arose, as it turned out.

The paint booth, under typical working conditions
I set up in my little paint booth with my cheap Harbor Freight "HVLP" gun, powered by my old underpowered pancake compressor, got the brackets nicely sanded and degreased, and laid on some primer and paint. I was extremely careful after they were painted, knowing that the paint wouldn't be as durable as the powder coated parts I had. I took my fresh-painted steel parts, and started installing them into the wing, and it was pretty cool: having these lovely shiny things installed into an actual identifiable airplane part was very satisfying.
However. (You knew this was coming. It's right there in the title.)

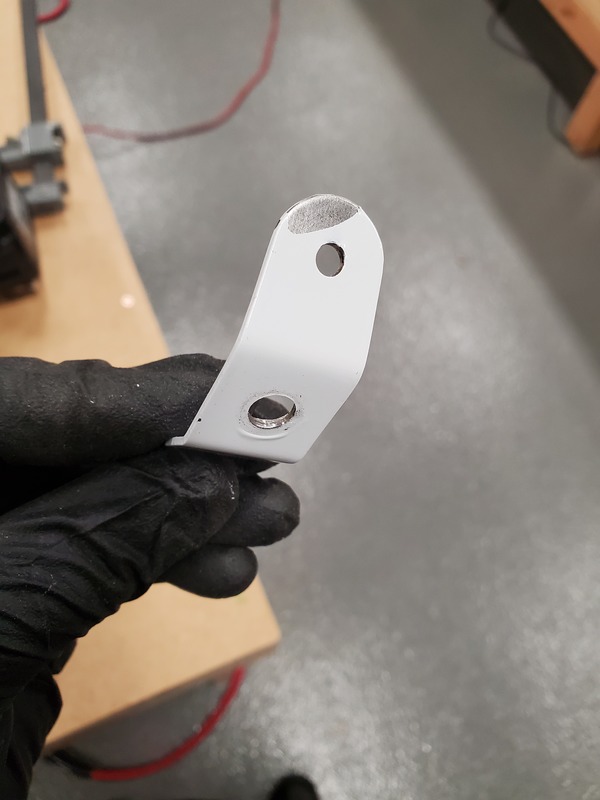
The "sidewise glance chipped it" tab
I noticed one of the wire tabs (the aforementioned tiny steel brackets) had a big chip out of it. I didn't recall even touching that tab with anything except gloved fingers. Other tabs showed raised paint where the compression tubes pressed on them. As careful as I was being, the painted surfaces took a bad beating, and it became obvious that the paint wasn't sticking very well. Maybe even at all.
Finally, I disassembled all the steel parts from inside the wing, and decided I'd have to repaint everything that was painted -- at this point, just the wire tabs, but I also needed to paint the compression tubes, and the drag wires, and I didn't want to have to redo them.

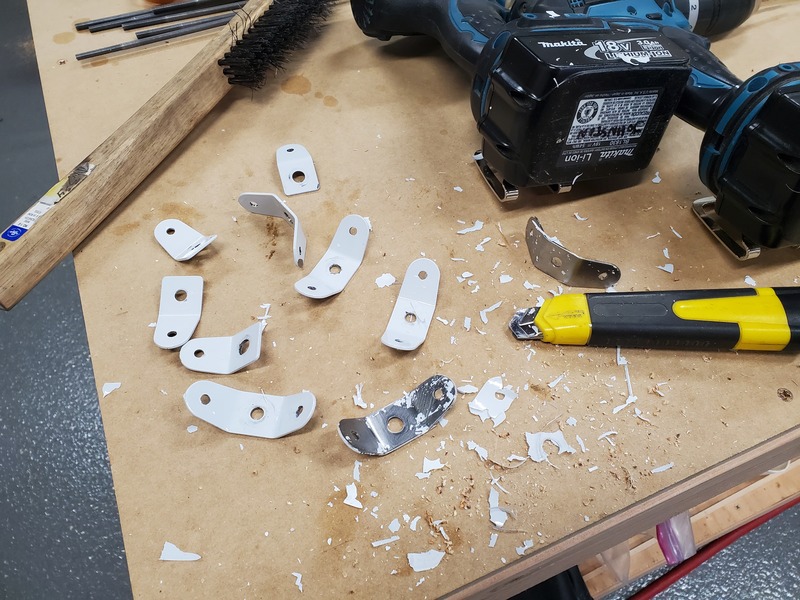
Look at the size of those paint flakes!
When I went to get rid of the old paint, it was shockingly easy to pull off huge leaves of paint, and it appeared that the primer almost uniformly failed to stick to the steel. Like, at all. It was real bad. I only dealt with the tabs for this wing, but it's clear I'm going to have to redo all the painted parts now, and that time and effort was completely wasted.
In my effort to figure out what went wrong, I went over the procedure I'd followed:
- Sand parts with 220 grit sandpaper (Stewart Systems suggestion)
- Wire the small parts up with aluminum wire hangers (forum suggestion)
- Degrease with naphtha/acetone mix (forum suggestion)
- Spray multiple fog coats as Stewart Systems directs
- Spray a final wet coat as Stewart Systems directs
- Keep parts was warm as possible (Stewart Systems says 70° F or more, but it was in the 40s)
In the mean time, I'd watched some more Stewart Systems videos, and came across one that looked super generic, but ended up being full of really useful information, and which helped show me some of the spots I'd gone wrong.
Stewart Systems recommends, in their printed materials, that steel parts be sandblasted, and that they be cleaned and degreased only with their detergent (ie, water-based) cleaner, and then a wipe with 91% isopropyl alcohol just before painting.
I didn't have access to a sandblaster, so I'd called their tech support line, and got the advice to use 220 grit sandpaper, which now seemed rather ill-considered, since it left the metal more polished than "toothy" like their paint would need to stick. I had taken the forum's advice on the degreaser (the rationale being that alcohol, which had been my first choice, would evaporate too fast, and promote rust). My attempts to spray light fog coats and wet coats were somewhat thwarted by poor lighting: most of my build time, particularly in winter, happens when it's fully dark out, and my sole source of light was a very bright but single-point worklight.
So, I'd left the surface nicely polished, with a possible residue of solvent on it, and for some reason the water-based primer, which needs a mechanical (rather than chemical) bond, didn't stick very well. Weird.

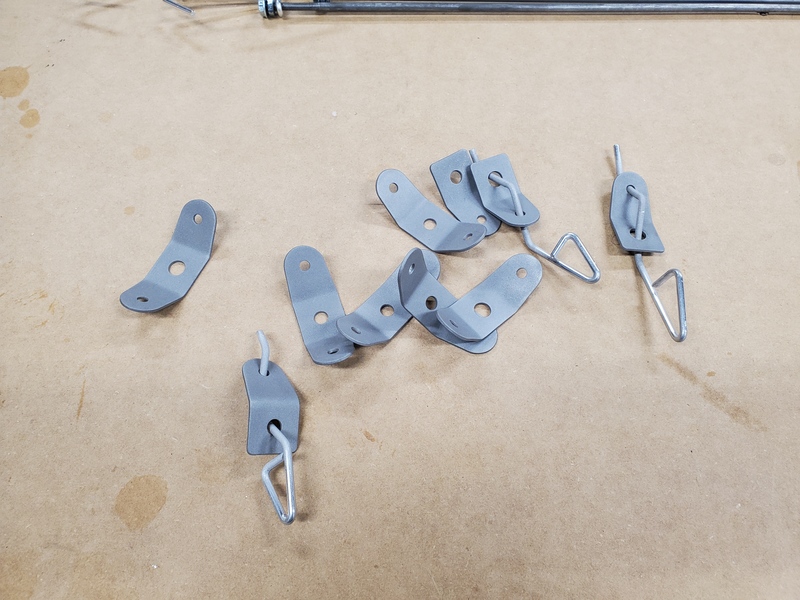
Wire tabs, now nicely sandblasted
As a result, I've spent the last week or so cleaning up my parts, sandblasting them with my new sandblasting setup (since it was clearly necessary), and cleaning them with the approved EkoClean detergent and 91% alcohol before spraying them with a series of more-or-less fog coats of primer. Before and after painting, the parts live in my unexpectedly useful Easy Bake™ Rib Oven, which has been converted with spots to hold painted parts, keeping their temperature in the mid 70s.
Initial signs are positive, but I won't know until the final coat of paint is on and dry. Even then, apparently it takes about a month for the Stewart Systems paint to fully cure, so attempting to put pressure on the parts (ie, install them in the wing) before then will probably cause it to buckle again.
However, if it works out, I will at least know how to approach repainting all the other pieces. (This time around, I only dealt with the hardware for this wing, so I could prove the process before wasting a lot more time.) Here's hoping I got it right this time.
Posted at 22:28 permanent link category: /charger
Categories: all aviation Building a Biplane bicycle gadgets misc motorcycle theater